(click to embiggen)
Entrance
The approach to the pyramid of Dolmar is flanked by two rows of inscribed obelisks, which I already described previously. The entrance itself is up a flight of steps, and is barred by enormous double stone doors. Pushing them open is easy thanks to a delicate counterweight, but doing so triggers a spear trap to spring up in the porch. A grid of holes is visible in the stone floor of the porch, through which the spears will emerge.
A1: Corridor
Along the corridor, the stone floor slabs are cracked and dented in one spot. Above, the ceiling tiles are interrupted by a single large block of granite. Stepping on the slab immediately before the cracked section triggers the falling-block trap after a second’s delay. The trap resets itself automatically.
Just before the entrance into the Scarab Chamber, the corridor is flanked by two pairs of muscular statues, each holding a greatsword upright. A gauzy veil in front of each pair of statues hides the tripwire which activates the trap, bringing the statues’ greatswords down violently on the hapless victim.
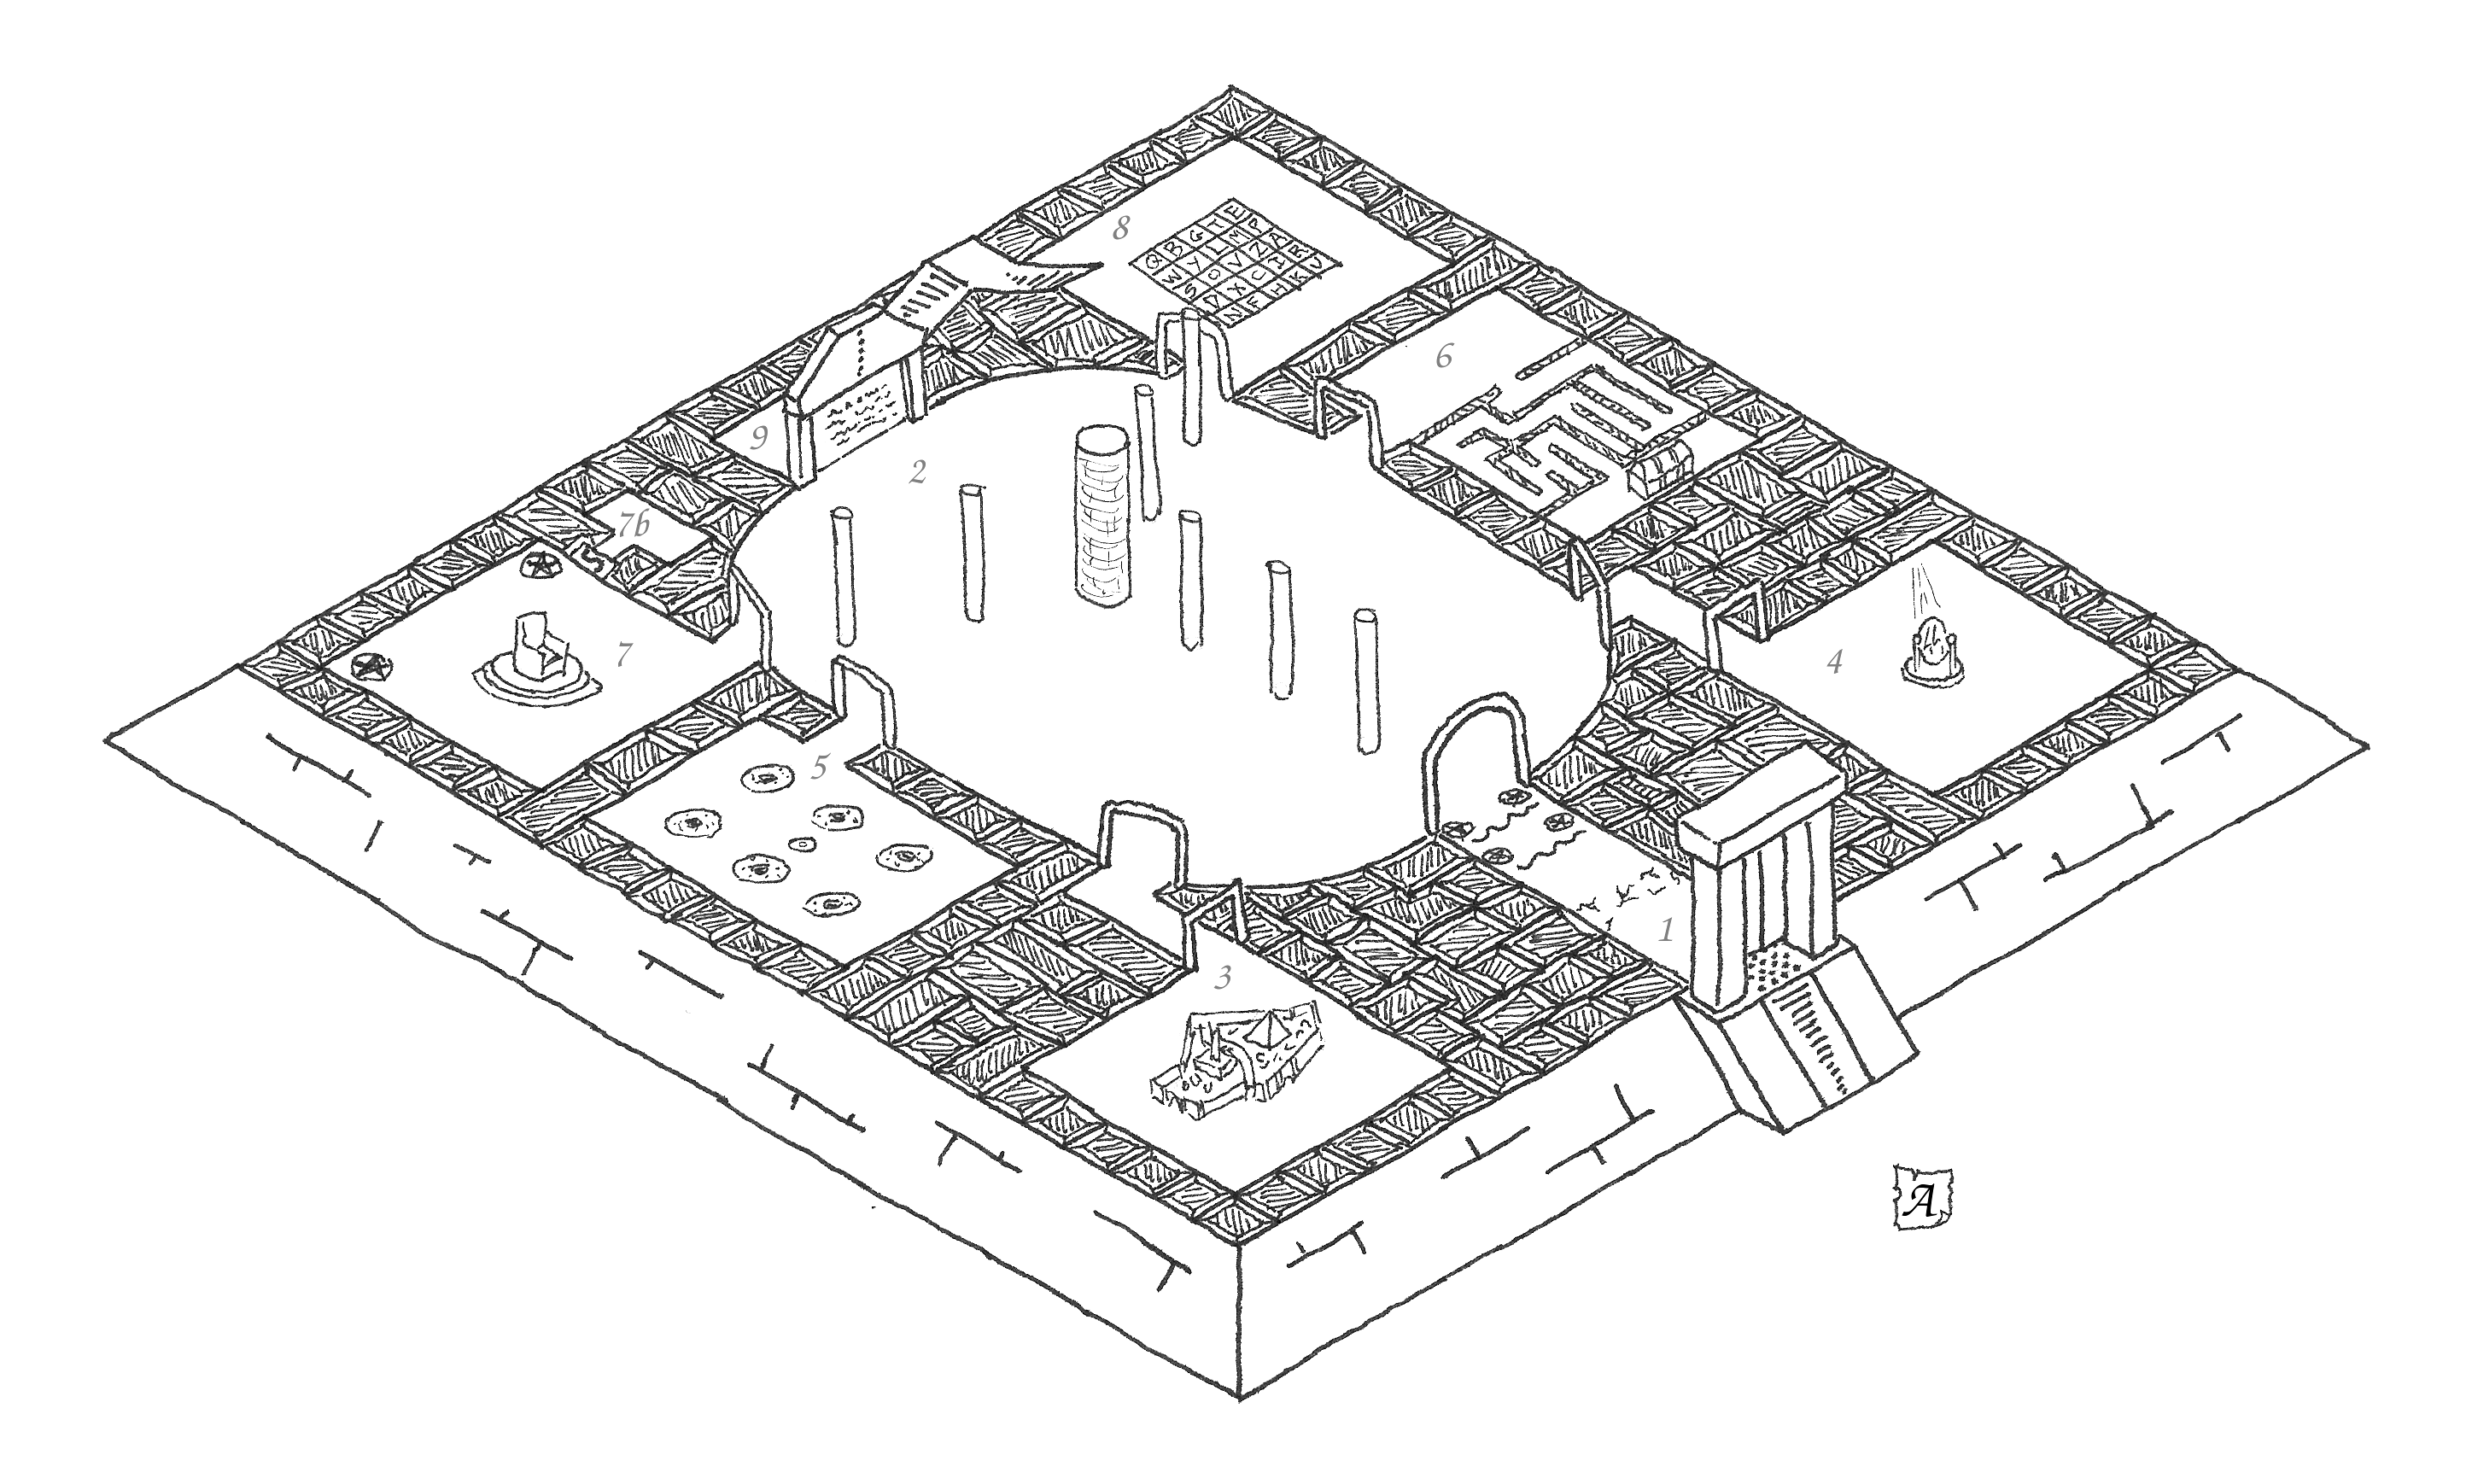
A2: Scarab Chamber
The Scarab Chamber is shaped like the beetle for which it is named. Rows of carved columns mark the edge lines of its carapace, with a very wide central column where the lines meet. This central column is of brick. Six side passages branch off like legs, leading to various side chambers. At the head end of the chamber is a great door, made from a single colossal block of granite rigged to a clever mechanism. Above the lintel of the doorway, a column of six circular sockets is edged in brass.
Written on the great door is the following:
The door can be opened by placing the stone tokens in the correct order in the sockets (from the top: pendant, book, crown, river, dagger, jewel).
A3: Model Room
In the first side-room is a model of the city, carved from stone. The pyramid and the temple are clearly visible, as is a dry channel depicting the river.
If the river channel is filled with water, the pyramid model will split open to reveal a circular stone token marked with a river symbol.
A4: Astronomical Room
In the second room, a thin shaft brings a beam of bright sunlight inside, where it strikes a brass mirror on a turntable. The ceiling is decorated with images of the constellations, the moon, and the sun. The mirror is faded with the years, but with some polishing it will soon give a bright reflection again. The mirror is currently oriented to reflect the light towards the ceiling image of the moon. Pointing it at the sun instead will cause the turntable to rise up, revealing a cavity containing a stone token marked with a crown symbol.
A5: Choice Room
In the third room, the floor has several circular holes the approximate width of a human arm. Peering inside the hole, one can see a lever which can be pulled to activate something. On the floor around each hole are decorations. One hole is painted around with golden coins and jewels. Another is decorated with skulls, wicked blades, broken bones, and drops of blood. A third hole has images of idyllic scenery and relaxing figures. A fourth hole is surrounded by depictions of succulent fruit of every kind. The fifth hole depicts attractive couples fawning over each other and presenting gifts. The sixth and final hole shows crowns, sceptres, and thrones. Pulling the lever in the second hole (skulls, blood, etc) causes a pedestal to rise from the centre of the floor bearing a stone token with a dagger symbol. Activating any other hole will trigger spring-loaded blades inside the hole itself.
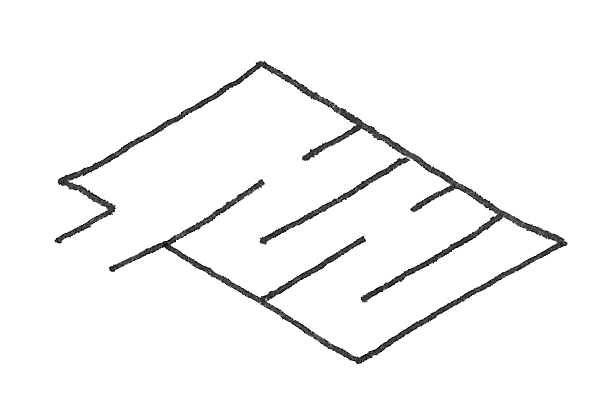
A6: Double Maze
The fourth room appears to contain a waist-high maze of low walls, at the other end of which is a chest. In fact, the walls are illusory and can be walked through. The real maze is composed of invisible walls (see map below), and these span from the ceiling to the floor. The chest, once opened, appears to be empty. Its contents are actually merely concealed by illusion: within is a stone token with a jewel symbol.
A7: Grandiose Room
The fifth room has a glorious throne decorated in gold and gems, two imposing muscular statues, grandiosely-carved walls, and inscriptions just above head height. The inscriptions are various prideful and self-congratulatory messages; see examples below.
Low down, partway along the base of one wall and cunningly integrated into the carvings, is a low entrance into room A7b. The entrance is easily missed if one is looking only at the inscriptions.
A7b: Humble Room
This plain undecorated chamber contains only a small plinth holding a stone token with the symbol of a pendant.
A8: Alphabet Room
The third room’s floor consists of a grid of tiles, each marked with a letter. On the wall are painted depictions of every kind of precious gem and piece of jewellery. If you spell the name of the king, Dolmar, by pressing firmly on the tiles, one of the gem pictures will swing open to reveal a stone token marked with a book symbol.
A9: Stairs up
Beyond the great door of the Scarab Chamber, a staircase curves upwards.